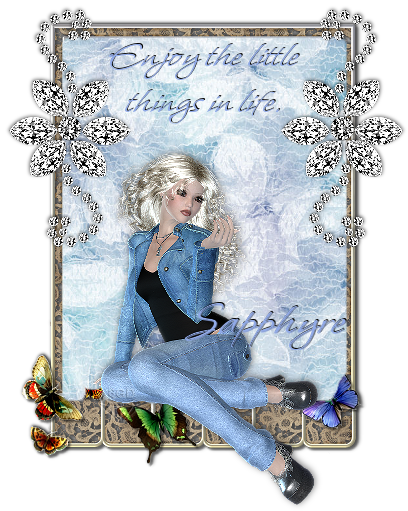
Click image above to view in full size.
©§GD December 20th, 2009
Thank you Lynne for allowing me the use of this beautiful kit!
Items used from the kit:
Butterfly Frame
Paper 5
Gem Flower 2
Other materials used:
Poser tube by Outlaw By Design (obdft127)
PSP you can get a free trial of the current version out HERE
for this tutorial this tag was created using version 9.01
OK, let's tag!
Remember to SAVE often as I won't be reminding you *smiles*
Step 1: Open up your needed pieces from the kit (or alternate ones you have chosen to use). Minimize in
PSP. Open up a New Image, I like room to work, we can resize it later. 700x700 pixels, Transparent
background.
Step 2: Maximize the Butterfly Frame, copy / paste in a new raster layer. Resize by 65%. Rename this
layer as FRAME. With your Magic Wand Tool, click on the INSIDE of the frame, modify - expand 8 pixels,
click ok.
Step 3: Maximize the Paper 5. Copy / Paste as a new layer. Resize 65%. Selections - Invert. Hit your
Delete key. Rename this layer as FRAME BACK.
Step 4: Add a dropshadow to your FRAME layer with these settings:
Vertical: -1, horizontal: 1, opacity: 100, blur: 5, color: #000000 (black).
Step 5: Maximize Gem Flower 2. Copy / paste as a new layer. Resize 65%. Sharpen - sharpen. Add
dropshadow same as FRAME except lower the opacity setting down to 50. Rename this layer as FLOWER DECO. Move to the top of your FRAME. Duplicate - image - mirror. Layers - Merge - Merge down.
Step 6: Maximize your tube of choice. If using the same poser tube I have used, resize the tube 50% two
times. Add a dropshadow with these settings:
Vertical: -1, horizontal: 1, opacity: 50, blur: 10, color: #000000 (black).
Move into place of your choosing. Rename this layer as POSER or TUBE.
Step 7: With font of choice, type out your text in the top portion of your framed image. If you have the
Whisper font this is the settings I used: Size 30, no stroke. Font color: #91AAE8 and a dropshadow of
these settings: vertical: -1, horizontal: 1, opacity: 100, blur: 1, color: #000000 (black).
Step 8: Type out your name, here I used a size of 48, same settings as in step 7.
Step 9: Add your copyright info that may be needed and or your watermark. Save image as a .png file and
you are done!
I hope you have enjoyed this tutorial and will be back to check out more as they are created. If you
should have any troubles along the way, please feel free to drop me an email at sgd1970@att.net with the
subject title of TAG TUT HELP.
Til next time....Happy PSP-ing!
*hugz*
§apphyre


