Click above image to view in full size.
©§GD on October 24, 2009.
Materials Needed:
PSP, I use version 9.01, trial version can be gotten HERE
Font of Choice ( I used Pristina)
Tube of choice (I am using a freebie tube from Outlaw By Design)
Thank you to Sabrina for allowing me to work with this very pretty kit!
And Happy Anniversary coming up :)
Materials I used from this kit are:
smd me paper 15
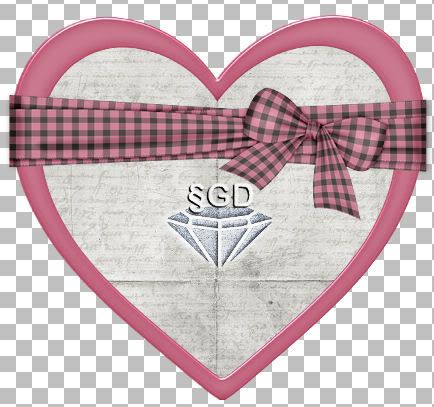
smd me frame 01
smd me crisscross bow 01
smd me butterfly 01
REMEMBER to SAVE, SAVE, SAVE! As I won't be reminding along the way!
♥ Let's Tag! ♥
Step 1: Open up your needed tubes in PSP, minimize for now. Open new image 600x600 pixels, transparent.
Step 2: Maximize smd me frame 01. Copy / paste as a new layer. Close original. Image resize 75%. Name this layer FRAME.
Step 3: Maximize smd me paper 15. Copy, close original. Click the center of your FRAME with your magic wand tool. Selections - modify, expand 7 pixels, click ok. Right click on your graphic and paste as a new layer. Image - resize 75% two times. Selections - invert. Hit delete 1 time. Selections - select none. Rename this layer as PAPER. Move this layer underneath your frame layer.
Step 4: Maximize smd me crisscross bow 01. Copy, close original, paste as a new layer. Rename layer to BOW. Image - resize 78%. Move toward top of heart. See screenshot below for placement. Adjust sharpness - sharpen.
Click image above to view Screen shot in full view.
Step 5: Maximize smd me butterfly 01. Copy, close original, paste as a new layer. Rename layer to BUTTERFLY. Resize 50% two times. Adjust sharpness - sharpen. Dropshadow: vertical: 1, horizontal: -1, opacity: 50, blur: 1.00, color: black (#000000). Move butterfly to top center know of your bow. See screenshot for placement.

Click image above to view Screen shot in full view.
Step 6: Maximize your tube. Copy, close original, paste as a new layer. Now depending upon which tube you used, your resize will vary from mine. If using the same tube I am using, resize 50% two times. Move to left side of frame. Rename layer to TUBE. Dropshadow as in step 5.
Step 7: With font of choice, size according to your font (you want text to fit "inside" of your frame. New raster layer, name it text. Here I used Pristina, size 36, no stroke. color: #C26880. Using your raster deform tool, rotate your text slightly to the left. Add a dropshadow as in step 5, except on the blur change it to 0. Move your text layer in your layer pallette down underneath your TUBE layer.
Step 8: Go back to your FRAME layer, add a dropshadow as in step 5, but change the opacity to 100 and the blur to 10.
Step 9: New raster layer, add any copyright info / watermark to this layer, final save (as a .png file so you can use your tag over and over, just adding names to new raster layers) crop your tag down in size as close to the image as you can without cutting off the shadowing. And you are done! YAY!
I hope you have enjoyed this tutorial and will be back to try out more as they are written :)
If you should have any troubles, please feel to email me here at sapphyre@gmx.com with a subject line of TAG TUT HELP and I will be more than glad to help you out.
Hugz!
§apphyre