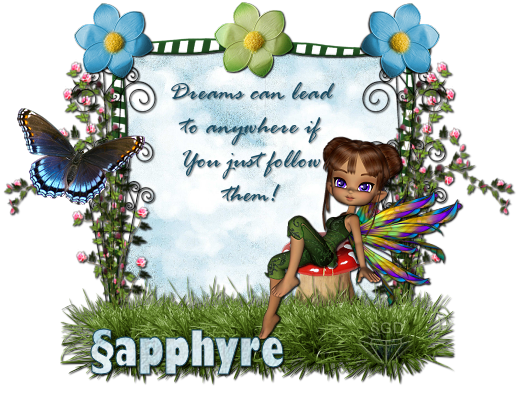
Click tag above to view in full size.
Follow Your Dreams is ©§GD written on September 2, 2009
Created in PSP v9.01 should be able to be completed in any version of PSP with minor adjustments made for the locations of tools used in the tutorial.
Please DO NOT copy, translate, send thru email or upload this tutorial to another website without written permission from the tutorial writer. Thank You. All ideas steming from this tutorial is of my own and any similarities to others on the web are purely coincidental.
Materials Needed:
PSP you can get a trial version HERE
The Back to Nature scrapkit from Julie aka Bits 'N' Bobs (This is a limited time freebie til Sept 14th!)
Julie, this kit is fantastic! Thanks for the blog train freebie!
Fancy font and bold font of your choosing. (I am using Rage Italic and Gill Sans Ultra Bold Condensed).
♥ Ok, lets go tag! ♥
Remember to save along the way!
1. Open your zip of the Back to Nature kit. The pieces used for this tut are: BNB-paper-7; BNB-frame-1; taj3; BNB-flower-1; BNB-flower-3; BNB-element-2; and BNB-butterfly-3. Minimize in PSP. Open your chosen fonts if using ones different from listed above, minimize.
2. Maximize BNB-frame-1. Shift+D, close out the original. This will be our base for our tag. Rename to FRAME. New Raster Layer, rename to CANVAS. Resize canvas layer to 600x600 pixels, placement is in the center of the square. This will give us some working room. We will resize later!
3. With your Magic Wand Tool - Tolerance and Feather both set to 0 and Anti-Alias checked, click inside your frame. Selections - Modify - Expand 6 pixels. Keeping this selected! New Raster Layer, name it BACKGROUND. Right click - Arrange - Move Down. Maximize your BNB-paper-7, copy, close original, Paste Into Selection. Selections - Select None.
4. Maximize BNB-element-2. Copy, close original, Paste as a New Layer. Rename MUSHROOM. Resize 55%, resize all layers unchecked. Place at the right bottom side of your frame. (The mushroom should be behind your frame layer with the grass slightly covering it).
5. Maximize BNB-taj3. Copy, close original, Paste as a New Layer. Rename to GIRL. Arrange - Bring to Top. Resize 60%, all layers unchecked. Adjust Sharpness - Sharpen. Place her sitting on the mushroom. (She should be on top of your frame layer so her feet sit on top of the grass).
6. Maximize BNB-butterfly-3. Copy, close original, Paste as a New Layer. Rename BUTTERFLY. Resize 35%, all layers unchecked. Adjust sharpness- sharpen. Place butterfly on the left side of your frame on the flower bush.
7. Maximize BNB-flower-3. Copy, close original, paste as a new layer. Rename to FLOWER. Resize 35%. Adjust sharpness - sharpen. Place at the top left of your frame. Duplicate. Image - Mirror. Layers - Merge - Merge Down.
8. Maximize BNB-flower-1. Copy, close original. Paste as a new layer. Rename FLOWER. Resize 35%, adjust sharpness-sharpen. Place in the top center of your frame. Layers- Merge- Merge Down.
9. Give each of your layers EXCEPT your canvas and your background layers a dropshadow. Settings used are: Vertical / Horizontal both set to 0; Opacity: 100; Blur: 5.00; Color: Black (#000000), shadow on new layer: unchecked.
10. New Raster Layer, rename WATERMARK. Add your watermark. New Raster Layer, rename COPYRIGHT INFO. Add your needed copyright info to this layer.
11. New Raster Layer, rename to TEXT. With your fancy font set to a small size to fit within your frame image. (Here I used Rage Italic, size: 20; Stroke:0). Set your background color to: #406879. Type out your phrase of choice. Dropshadow: V/H: both set to 0; Opacity: 100; Blur: 1.00; Color: Black (#000000), shadow on new layer: unchecked. Place text in the center of your frame.
12. New Raster Layer, rename to NAME. Background set to pattern, BNB-paper-7; Angle: 0; Scale: 100. Foreground color set to: #406879. With your wide font, adjusting for size of choice to accomodate your tag, Stroke set to 1.0, type out your name. (Here I used Gill Sans Ultra Bold Condensed, size: 36; Stroke: 1.0). Dropshadow same as above but change your Blur to 2.00.
13. Now, hide your NAME layer. Layers - Merge - Merge Visible. This way you can reuse your blank tag over and over adding new names as needed. Now unhide your name layer.
14. Using your Crop Tool, crop as close as you can to your merged layer without cropping out your dropshadow.
15. File - Export - PNG Optimizer. Settings I use for .png files are below:
Colors Tab: 16.7 Million Colors
Transparency Tab: Alpha channel transparency / Existing image or layer transparency.
Gamma Tab: I leave as is.
Format Tab: Non-Interlaced.
Click OK.
You are done! Yay!
I hope you have enjoyed this tutorial and will be back to try out more! Send me your results! I'd LOVE to see what you made!
If you have any problems, please email me here at sapphyre@gmx.com with Tag Tut Help in the subject line.
*Hugz*
§apphyre


No comments:
Post a Comment