Click above to view in full size.
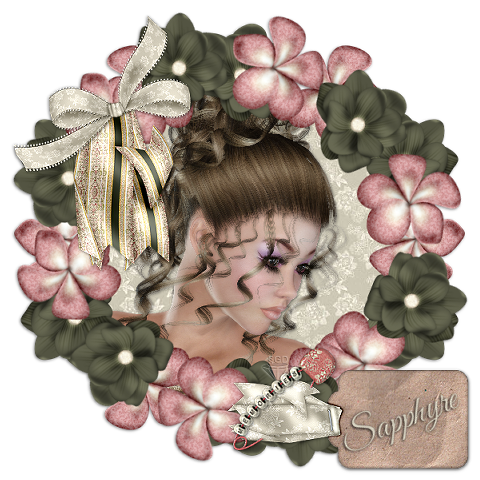
Sweet Memories ©§GD on October 22, 2009
Materials Needed:
PSP, I use version 9.01. For a trial version of PSP, click HERE
Scrap kit called Exquisite by Bits 'N' Bobs
(Thanks Julie for this beautiful kit to work with)
Pieces I have used are:
BNB Flower
BNB Flower 4
BNB Bow 4
BNB Folded Ribbon 2
BNB Tag 1
BNB Pin 1
Font of your Choice (I am using Good Vibrations ROB)
Tube of your choice. I am using a "freebie" from Outlaw By Designs
REMEMBER to SAVE, SAVE, SAVE! As I won't be reminding along the way!
♥ Let's Tag! ♥
Step 1: Open a new Raster Layer 600x600 pixels, transparent. Rename this layer as BG (for background).
Step 2: Open up BNB-Flower and BNB-Flower-4. Working with BNB-Flower-4 first...copy / close original and paste as a new layer onto your BG canvas. Resize 50%. Rename to FLOWER 1. Move to the left side of your canvas a little over 1/2 way up towards the top of your canvas. Right click, Duplicate. Image - Mirror. Highlight FLOWER 1, Duplicate, Image - Flip. Duplicate, Image - Mirror. Highlight FLOWER 1 again, Duplicate, move the copy towards the top center position, Duplicate, Image - Flip. Hide your BG layer. Layers - Merge - Merge Visible. Rename as FLOWER 1 (again). Duplicate, Image - Rotate - Free Rotate. To the Right and 45. Right click - Arrange - Move to top.
Step 3: Working with BNB-Flower now. Copy / PAste as a new layer onto your BG image. Resize 50%. Rename to FLOWER 2. Move FLOWER 2 to top between the 2 flowers on the top right hand side of your frame. Duplicate, Image - Mirror. Duplicate, Image - Flip. Duplicate, Image - Mirror. Duplicate and move copy to empty space on the right. Duplicate, Image - Mirror. Hide FLOWER 1 and BG layers. Layers - Merge - Merge Visible. Rename merged layer as FLOWER 2 (again). Unhide FLOWER 1, keeping BG hidden still, Merge-Merge Visible. Rename merged layer to FLOWER FRAME.
Step 4: With Magic wand tool, click on the center of the FLOWER FRAME. Selections - Modify - Expand. Expand 15 pixels. Click OK. Open up BNB-PAPER2. Copy / paste as a new layer, move this layer under your FLOWER FRAME layer. Selections - Invert. Press Delete 1-2 times. Selections - Select None. Rename this layer as FRAME BG.
Step 5: Open your tube of choice (your person / people tube) here I used a tube by Outlaw By Designs - outlawbydesignft165 (a free tube). Copy / paste as a new layer. Resize 50% 2x. Move into place where you'd like your tube to be.
Dropshadow: Vertical / Horizontal: both set to 1, Opacity: 50, Blur: 5.00 and color: black (#000000). Rename this layer GIRL.
Step 6: With your magic wand tool, highlight your FLOWER FRAME layer. Click your wand outside the frame. Selections - Modify 5 pixels. Click OK. Highlight GIRL layer. Press Delete. Selections - Select None.
Step 7: Open BNB-BOW-4. Copy / Paste as a new layer. Resize 75%. Move to top left of your FLOWER FRAME. Rename this layer BOW. Adjust - sharpen-sharpen. Dropshadow same as in step 5.
Step 8: Open bnb-folded-ribbon-2. Copy/paste as a new layer. Resize 75%. Adjust-sharpen-sharpen. Rename this layer as STREAMER. Move your STREAMER layer underneath your BOW layer in your layers pallette. With your eraser tool, erase the tiny edge that shows over the top edge of your BOW layer. Dropshadow as in step 5.
Step 9: Open BNB-Tag-1. Copy / paste as a new layer. Resize 75%. Image-rotate-free rotate. Left and 90. Adjust sharpen - sharpen. Rename layer to TAG. Move tag to the bottom right of your FLOWER FRAME. Add dropshadow as in step 5. Rename this layer as TAG.
Step 10: Open BNB-PIN-1. Copy / paste as a new layer. Rename to PIN. Resize 75% , repeat resize.. Rotate-free rotate. Left and 45. Adjust sharpness-sharpen more. Zoom in to your image to about 200%. With your freehand tool, select part of the pin that is laying across your tag's ribbon. (See screenshot for placement). Hit Delete one time. Zoom back out to 100% and selections - select none. Dropshadow as in step 5.
Screenshot below:
Thank you so much for trying out this tag tut! I hope you have enjoyed it and will check back for more tuts soon! If you should have any troubles, please feel free to email me at sgd247@att.net or Sapphyre@gmx.com with a subject line of TAG TUT HELP. I will get back to you asap and offer any help I can to you! Thanks again!
*Hugz*
§apphyre
(Thanks Julie for this beautiful kit to work with)
Pieces I have used are:
BNB Flower
BNB Flower 4
BNB Bow 4
BNB Folded Ribbon 2
BNB Tag 1
BNB Pin 1
Font of your Choice (I am using Good Vibrations ROB)
Tube of your choice. I am using a "freebie" from Outlaw By Designs
REMEMBER to SAVE, SAVE, SAVE! As I won't be reminding along the way!
♥ Let's Tag! ♥
Step 1: Open a new Raster Layer 600x600 pixels, transparent. Rename this layer as BG (for background).
Step 2: Open up BNB-Flower and BNB-Flower-4. Working with BNB-Flower-4 first...copy / close original and paste as a new layer onto your BG canvas. Resize 50%. Rename to FLOWER 1. Move to the left side of your canvas a little over 1/2 way up towards the top of your canvas. Right click, Duplicate. Image - Mirror. Highlight FLOWER 1, Duplicate, Image - Flip. Duplicate, Image - Mirror. Highlight FLOWER 1 again, Duplicate, move the copy towards the top center position, Duplicate, Image - Flip. Hide your BG layer. Layers - Merge - Merge Visible. Rename as FLOWER 1 (again). Duplicate, Image - Rotate - Free Rotate. To the Right and 45. Right click - Arrange - Move to top.
Step 3: Working with BNB-Flower now. Copy / PAste as a new layer onto your BG image. Resize 50%. Rename to FLOWER 2. Move FLOWER 2 to top between the 2 flowers on the top right hand side of your frame. Duplicate, Image - Mirror. Duplicate, Image - Flip. Duplicate, Image - Mirror. Duplicate and move copy to empty space on the right. Duplicate, Image - Mirror. Hide FLOWER 1 and BG layers. Layers - Merge - Merge Visible. Rename merged layer as FLOWER 2 (again). Unhide FLOWER 1, keeping BG hidden still, Merge-Merge Visible. Rename merged layer to FLOWER FRAME.
Step 4: With Magic wand tool, click on the center of the FLOWER FRAME. Selections - Modify - Expand. Expand 15 pixels. Click OK. Open up BNB-PAPER2. Copy / paste as a new layer, move this layer under your FLOWER FRAME layer. Selections - Invert. Press Delete 1-2 times. Selections - Select None. Rename this layer as FRAME BG.
Step 5: Open your tube of choice (your person / people tube) here I used a tube by Outlaw By Designs - outlawbydesignft165 (a free tube). Copy / paste as a new layer. Resize 50% 2x. Move into place where you'd like your tube to be.
Dropshadow: Vertical / Horizontal: both set to 1, Opacity: 50, Blur: 5.00 and color: black (#000000). Rename this layer GIRL.
Step 6: With your magic wand tool, highlight your FLOWER FRAME layer. Click your wand outside the frame. Selections - Modify 5 pixels. Click OK. Highlight GIRL layer. Press Delete. Selections - Select None.
Step 7: Open BNB-BOW-4. Copy / Paste as a new layer. Resize 75%. Move to top left of your FLOWER FRAME. Rename this layer BOW. Adjust - sharpen-sharpen. Dropshadow same as in step 5.
Step 8: Open bnb-folded-ribbon-2. Copy/paste as a new layer. Resize 75%. Adjust-sharpen-sharpen. Rename this layer as STREAMER. Move your STREAMER layer underneath your BOW layer in your layers pallette. With your eraser tool, erase the tiny edge that shows over the top edge of your BOW layer. Dropshadow as in step 5.
Step 9: Open BNB-Tag-1. Copy / paste as a new layer. Resize 75%. Image-rotate-free rotate. Left and 90. Adjust sharpen - sharpen. Rename layer to TAG. Move tag to the bottom right of your FLOWER FRAME. Add dropshadow as in step 5. Rename this layer as TAG.
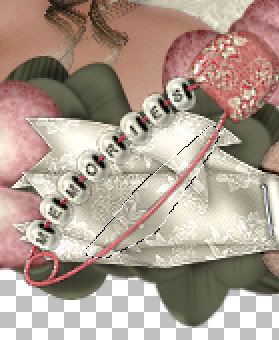
Step 10: Open BNB-PIN-1. Copy / paste as a new layer. Rename to PIN. Resize 75% , repeat resize.. Rotate-free rotate. Left and 45. Adjust sharpness-sharpen more. Zoom in to your image to about 200%. With your freehand tool, select part of the pin that is laying across your tag's ribbon. (See screenshot for placement). Hit Delete one time. Zoom back out to 100% and selections - select none. Dropshadow as in step 5.
Screenshot below:
(Click image above to view in full size).
The dotted line area is the area we are REMOVING from the PIN.
Step 11: With your background color set to #D1CCBB, activate your text tool. Font of your choice (here I am using Good Vibrations ROB) set to a size 36, no stroke. (You can go up or down in the size of your font according to the length of your name and style of font chosen). Type out your name. Using your Raster Deform tool, use the turner node and rotate your name around until it fits nicely going diagonally on your tag.
Dropshadow: vertical: 1, horizontal: -1, opacity: 100, blur: 5.00. color: black (#000000). Rename this layer to NAME. Hide NAME layer. Layers - merge-merge visible.
Dropshadow: vertical:1, horizontal: -1, opacity: 50, blur: 5.00, color: black (#000000). (Now you can use this tag over and over and just add names later that are different from yours).
Step 12: Resize your completed tag, ALL layers checked 80%. Add your watermark and any other copyright info as needed each on separate layers. Save your completed tag as a .png file and you are done!
YAY! You did it!
Thank you so much for trying out this tag tut! I hope you have enjoyed it and will check back for more tuts soon! If you should have any troubles, please feel free to email me at sgd247@att.net or Sapphyre@gmx.com with a subject line of TAG TUT HELP. I will get back to you asap and offer any help I can to you! Thanks again!
*Hugz*
§apphyre


No comments:
Post a Comment